Qualify Your Additive Manufacturing With CT Scanning
To the delight of engineers everywhere, the emergence of additive manufacturing, or 3D printing, offers the freedom to go where traditional manufacturing simply cannot. Much of the buzz around additive manufacturing is due to a dramatic decrease in production times — even as the demand for customized products accelerates.
Challenges & Considerations
While 3D printing represents a revolution in manufacturing, there are challenges and considerations involved with qualifying your additive manufactured part.
Strict regulations, pressure to find a measurement solution, and time and budget constraints are all considerations for manufacturers. Industries such as medical device, aerospace, defense, and automotive are particularly sensitive to how their parts are validated due to their highly regulated need for safety.
Meanwhile, customers are pushing for faster and faster inspection turn times. With traditional measurement methods, engineers find themselves chasing failure through the process of elimination. Is the defect part A or part B? Is it the design? Is the tolerance too open? How accurate is the machine producing the part? Weeks and months — not to mention a lot of money — can be spent trying to identify a problem. It’s a costly process that, fortunately, can be minimized.
So, what’s an additive manufacturer to do?
Radiography (X-ray) is an option, but it can be expensive.
Cutting parts is an option, but it’s destructive.
Fortunately, there is a cost-effective, non-destructive, and minimally intrusive option that is ideal for additive manufactured products: CT scanning.
Benefits of CT Scanning
CT scanning allows manufacturers to qualify their part in a non-destructive way where no other form of inspection can. Precision parts with small, complex, and fine geometry benefit especially from this technology, since they are very difficult to measure using even the most advanced laser-based scanning or CMM.
CT scanning is a quick and accurate way to validate the internal geometry of additive manufactured parts in 3D without applying any external forces or pressure that may alter or warp them. With accuracies reaching micron levels (or better), CT scanning also aids manufacturing projects that require 100% validation of high value printed parts through production.
Case Study Using Sample 3D Printed Part
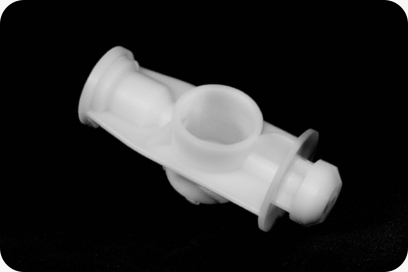
Here, we have a sample part that the Lab Services team at Industrial Inspection & Analysis (IIA) had made at a local 3D printing company. As you can see, the complexity of this part doesn’t allow for traditional inspection methods. How can we qualify the internal features without destroying the part? The reported accuracy of this particular 3D printing machine is +/-.005. Sounds pretty great. But who’s validating the machine? Who’s proving this .005?
With computer numerical control (CNC) machines, for instance, there is no industry standard for proving or qualifying them. We’re left to trust what the manufacturers and printers tell us about the accuracy of their machine.
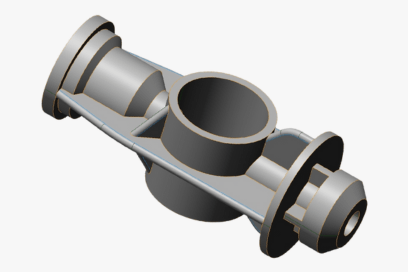
Using the sanitized digital representation of the part, a parametric or organic model can be built with extreme accuracy. Below is the design of the part.
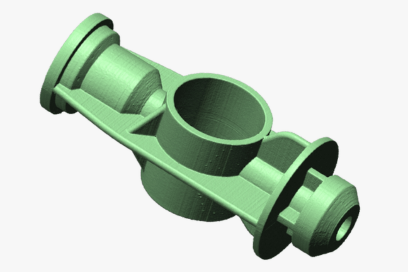
It’s important to note that all scanning platforms – regardless of capture technology – output a point cloud of data.
Compared to hand tools that capture point-to-point measurements, 3D scans more accurately capture the original part’s geometry, saving an incredible amount of time. Specifications on the machine we used are .0002 for resolution and accuracy.
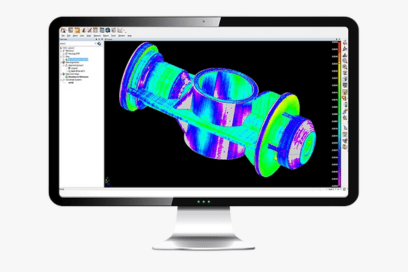
To qualify your part, we’re going to overlay or best fit the data to the CAD. We do this by either a datum alignment or best fit. Once these are overlaid we do a measurement from data to CAD and to display deviations. So what you’re seeing in color is deviation from nominal. Anything that isn’t green doesn’t match the CAD. Areas in cool colors such as blue and pink are negative or less material. Areas that are yellow or red – warm colors – are positive material.
Cost always depends on the size and complexity of the part, along with what chamber it fits in. But in comparison to the multiple hours, weeks and months of trying to find the problem the old way, the cost is minimal. Time is money.
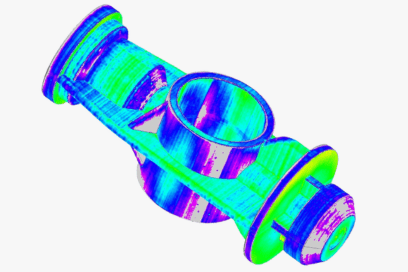
CT Scanning: An Ideal Option for Additive Manufacturers
In summary, the reason that your 3D printed part is not a candidate for traditional manufacturing methods is the same reason it is not an ideal candidate for traditional inspection methods — but it is just as vulnerable to failure. It’s a common misconception that parts made by 3D printers don’t need to be checked because they will be made perfectly and within the stated accuracy of the machine. But there are no ANSI standards to measure the accuracy of your equipment. So you’re left to trust the 3D printer manufacturer about the accuracy of their equipment.
A highly experienced inspection vendor like IIA can use industrial CT scanning to qualify additive manufactured parts quickly, while reducing inspection and production costs. In addition, you won’t have to deal with the process of elimination when your prototype doesn’t function. That means you save time and money and get to market faster.
IIA Can Help
With decades of experience, IIA provides high-quality dimensional inspection, advanced 3D scanning, modeling analysis, and geometry re-creation services that save time and money for manufacturers. Our highly trained professionals can promptly scan your additive manufactured parts in any phase of the product life cycle — during or after the development of your product.
We will customize your project to accurately and precisely meet your needs. We pride ourselves on our quality service, and we are confident that your manufacturing process will greatly benefit from more rapid and cost-effective results.


