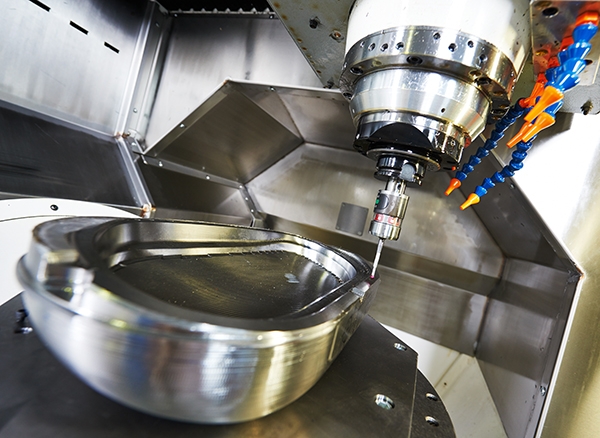
Did you know? IIA’s Irvine, CA Lab has one of the Largest CMMs in the U.S.

Brown & Sharpe Global Image 153010 CMM measures items up to 5’ x 9’

February 18, 2024 | < 1 min read
Our new Global Image CMM allows us to measure GOM calibration panels for a structured light scanner, something that cannot be accomplished with a laser scanner.

As a premier provider of advanced dimensional metrology services and solutions, Industrial Inspection & Analysis’s (IIA’s) Irvine, California-based lab, previously known as Q-PLUS Labs, proudly houses one of the most expansive area Coordinate Measuring Machines (CMM) in the United States. The Brown & Sharpe Global Image 153010 CMM, equipped with a Hexagon HP-C-VE vision sensor and Renishaw SP25 tactile scanning probe, represents IIA’s commitment to providing customers with even more meticulous and comprehensive dimensional metrology services.

The Global Image CMM measures large, intricate parts with unparalleled precision. With the capability to measure parts 9.8 feet in length and 5 feet in width, and the capacity to capture millions of data points per second, this machine empowers us to deliver intricately detailed and accurate measurements — even for the most intricate components.

The Global Image CMM system features standard articulating tactile probing (PH10MQ), articulating continuous scanning probing (SP25), and a unique, articulating camera probe — a feature that standard optical CMMs do not have. This high-resolution camera is capable of measuring features that may be challenging or even impossible to assess with a laser scanner. Additionally, the sensor serves a crucial role in inspecting parts for any potential defects, enriching the suite of services we offer.

The inclusion of the Global Image CMM within our inventory of dimensional metrology equipment strengthens IIA’s position as one of the most exceptionally equipped dimensional metrology labs in the United States.

Advantages of the Global Image CMM

The Global Image CMM extends several key benefits to customers:

  1. Accuracy: 

    The precision offered by the Global Image CMM allows customers to ensure that their parts conform to stringent tolerances.

  2. Large Measurement Volume: 

    With the capacity to measure sizeable parts, this CMM is ideal for inspecting large and complex components, such as automotive body panels and aerospace parts.

  3. Rapid Measurement Speed: 

    When using the SP25 scanning probe, the machine’s swift scanning capability helps in reducing inspection time and associated costs for customers.

  4. Non-Contact Measurement: 

    The non-contact method used by the Global Image CMM, utilizing an optical video probe, minimizes the risk of part damage during measurement.

  5. Versatility: 

    Its adaptability enables measurement of a wide array of parts—simple or intricate—making it a valuable asset for diverse manufacturing sectors.

Applications of the Global Image

The versatile capabilities of the Global Image CMM render it indispensable across various applications:

  • Automotive Manufacturing: Measurement of automotive body panels, engine blocks, and diverse automotive components.
  • Aerospace Manufacturing: Inspection of aircraft wings, fuselage sections, and other aerospace components.
  • Medical Device Manufacturing: Assessment of medical implants, surgical instruments, and related medical devices.
  • Electronics Manufacturing: Measurement of circuit boards, electronic components, and other devices in the electronics industry.
  • General Manufacturing: Versatile measurement applications across different industries, ranging from simple to complex parts.

Enhanced Functionality of the HP-C Vision Sensor

The HP-C Vision Sensor, embedded within the Global Image CMM, offers a range of practical benefits:

  • Multifaceted Measurement Access: Utilizing multi-capture technology, the HP-C swiftly collects multiple measurement features, enabling efficient data capture for detailed analysis of individual features.
  • Extended Measurement Field: The HP-C, in tandem with PC-DMIS software, efficiently captures and measures features beyond the field of view, significantly improving throughput for larger and diverse components.
  • Accuracy Maintenance: Illuminating the work area, the HP-C ensures comprehensive data capture, featuring a higher resolution zoom to attain precise measurement results.
  • Selectable Viewfields and Pixel Sizes: Operators can select various fields of view to measure more or larger features or opt for smaller measurement areas to achieve higher measurement accuracy.
  • Camera and Illumination System: Equipped with a 3-megapixel camera and LED illumination, the HP-C delivers precise results, even in challenging conditions.
  • Automated Sensor Exchange: Utilizing Hexagon’s kinematic joint interface, the HP-C enables automatic sensor exchange, supporting the use of multiple sensors for the same part on a single machine.
  • Harmonized System: The HP-C was specifically developed for Hexagon CMMs and PC-DMIS software, ensuring compatibility and optimized system performance.

The integration of the HP-C Vision Sensor enhances the functionality and precision of the Global Image CMM, making it an even more versatile and robust tool for dimensional metrology across various industrial applications.

Adaptability Across Diverse Industries

The Global Image CMM offers an array of benefits, including high precision, large measurement capabilities, swift measurement functions, non-contact measurement, and broad applicability across various industries. IIA is dedicated to delivering top-notch dimensional metrology services, and the versatility of the Global Image underscores this commitment.

For more information about the Global Image or any of our extensive dimensional metrology services, please feel free to contact us today.